
A new paver patio can transform a backyard, creating a durable and attractive space for dining, relaxing, and entertaining. But the path from a patch of lawn to a finished patio is a carefully orchestrated process. The long-term success of a paver project in Sacramento isn't just about the stones you see on the surface; it's about the unseen layers of preparation, the detailed planning, and the skilled workmanship that go into the installation. This walkthrough demystifies the sequence of events, highlighting the critical checkpoints and the essential questions you should ask your contractor every step of the way.
In a Nutshell
- Project Scope: A walkthrough of a hypothetical paver patio installation, from initial design to final inspection. We focus on the process and questions to ask, not on prescribing specific measurements or costs.
- Key Stages: The process includes design and permitting, extensive site preparation, precise base construction, paver installation, and finishing work. Each stage builds on the last.
- Primary Dependencies: The project schedule depends on homeowner decisions, contractor availability, material delivery, potential permit review times, and weather.
- Unresolved Questions for Your Project: Before work begins, your contractor must assess the site's soil type, existing drainage patterns, utility locations, and local jurisdiction requirements to create a durable, site-specific plan.
The Blueprint: Design, Planning, and Permits
Every successful hardscape project begins with a clear plan. The design phase is where you translate your vision into a buildable reality. This involves choosing the patio's size, shape, and location, as well as selecting the type, color, and pattern of the pavers. Will it be a simple square or an intricate space with curves and multiple levels? Will it need to support a future outdoor kitchen or a heavy hot tub? These decisions directly influence the project's complexity and structural requirements. A professional contractor can help you refine these ideas and create a scaled drawing.
Once you have a design, the next step is to determine the approval requirements. This is a critical point of clarification. Do not assume a permit is not needed. While a simple, on-grade patio might be exempt, features like retaining walls over a certain height (often two to four feet), permanent patio covers, or extensive electrical or gas lines will almost certainly require a permit from your local building authority. For a project in the Sacramento area, the governing body could be the City of Sacramento, Sacramento County, or an adjacent city like Folsom or Elk Grove, each with its own set of rules. Your contractor should be responsible for identifying the correct jurisdiction and managing the permit application process. Ask them to outline this responsibility in their proposal. if your property is part of a Homeowners Association (HOA), you will likely need to submit your plans for their review and approval before any work can begin.
Breaking Ground: Site Preparation and Demolition
With a plan approved, the physical work begins. The first order of business is preparing the site, which involves much more than just clearing the area. Your contractor will need to establish clear access for workers and equipment, taking care to protect surrounding lawns, plants, and structures. Any existing features like an old concrete slab or deck must be demolished and hauled away.
Before any digging starts, the location of underground utilities must be confirmed. In Northern California, this means contacting USA North 811 at least two working days before excavation. This free service marks the approximate location of buried utility lines for gas, electricity, water, and communications. Digging without this step is dangerous and can lead to costly repairs and service outages. Your contractor should manage this process.
Next comes excavation. The crew will dig out the patio area to the required depth to accommodate the layers of base material and the pavers themselves. This exposed native soil is called the subgrade. The stability of the subgrade is the single most important factor in a patio's longevity. Sacramento's region is known for areas with expansive clay soils, which swell when wet and shrink when dry. An experienced local contractor will assess the subgrade and determine if it needs special preparation, such as amendment or extra stabilization, to prevent future movement. This is a key conversation to have. Ask your contractor: "How will you assess our soil conditions, and what is the plan for preparing the subgrade to ensure a stable foundation?" Proper grading of the subgrade is also established at this stage to create the initial slope for drainage, the system for moving water away from the patio and your home's foundation.
The Construction Sequence: Base, Sand, and Pavers
Ready to compare vetted project options?
Use Project Match privately when your scope is clear enough for contractor conversations.
Start Project MatchAfter the subgrade is properly graded and compacted, the crew begins building the patio's structural layers. First is the aggregate base, a layer of crushed rock that provides the primary support for the pavers. This base distributes the load from foot traffic and furniture over the subgrade and provides a crucial drainage layer for any water that seeps through the joints. The type and thickness of the base material are critical design elements. Ask your installer what they propose and how that specification aligns with the paver manufacturer's instructions and accounts for your specific site conditions, including soil type and intended use (e.g., a simple walkway versus a patio supporting a heavy structure).
Each layer of base material, typically added in two- to four-inch lifts, must be individually moistened and compacted using a heavy piece of equipment called a plate compactor. This process creates a dense, stable, and interlocking foundation. Inadequate compaction is a primary cause of paver patio failure, leading to sinking and uneven surfaces over time. Your contractor's proposal should specify that compaction of the base is a required step.
Once the base is fully compacted and perfectly smooth, a one-inch layer of coarse sand, known as bedding sand, is spread over the top. This layer is not compacted. Instead, it is carefully screeded to create a perfectly level and smooth bed in which to set the individual pavers. The bedding sand allows for minor adjustments to each paver's height, ensuring a flat finished surface without rocking or wobbling.
Finishing Touches: Edges, Joints, and Sealing
With the foundation set, the crew begins laying the pavers in the chosen pattern. This is where the visual design comes to life. Skilled installers work from a corner outward, using string lines to keep the pattern straight and consistent. Pavers along the edge of the patio will need to be cut to fit the desired shape using a powerful diamond-blade saw. This requires precision to create clean, tight-fitting borders.
As the pavers are laid, a critical component is installed around the entire perimeter: edge restraints. These are rigid strips of plastic, metal, or concrete that are spiked into the compacted base. Their job is to act as a frame, locking the entire field of pavers together and preventing them from spreading or shifting apart over time. A paver patio installed without proper edge restraints is guaranteed to fail. Ask your contractor what type of restraint they plan to use and how it will be secured.
After all pavers are in place and the edge restraints are secured, the next step is to fill the joints. This is typically done with either regular joint sand or, more commonly today, polymeric sand. Polymeric sand contains special polymers that, when activated with water, bind the sand particles together and to the pavers. This creates a firm yet flexible joint that helps lock the pavers in place, deters weed growth, and resists erosion from rain and insects.
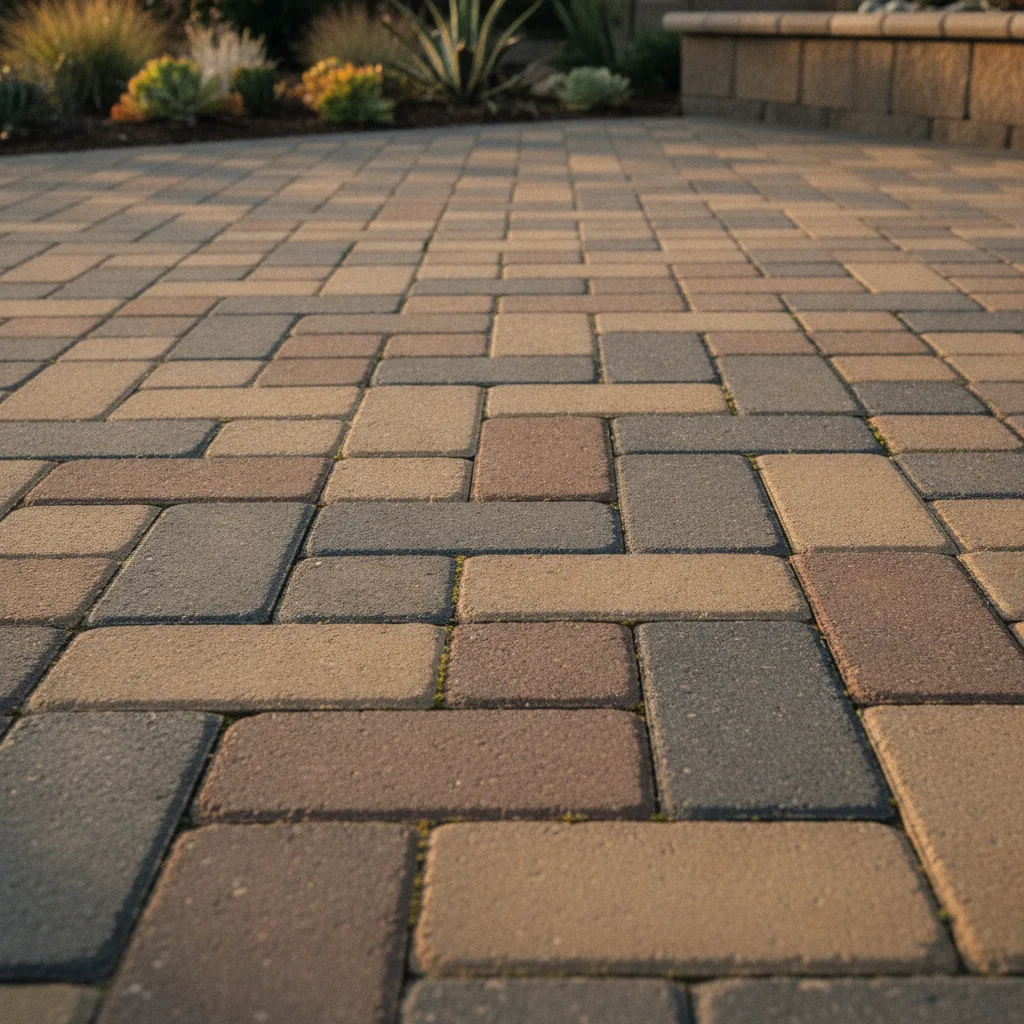
Finally, the entire patio surface is swept clean, and a plate compactor is run over the pavers. This important step settles the pavers firmly into the bedding sand, smooths out any minor height differences, and vibrates the joint sand deep into the joints for a tight lock. If using polymeric sand, the patio is then lightly misted with water to activate the polymers, following the manufacturer's specific instructions for curing.
Hypothetical Planning Examples, Not Documented Projects
Project timelines can vary significantly based on scope, site conditions, and administrative requirements. The following three scenarios are hypothetical assumptions to illustrate how a schedule can change, not documented project durations.
Scenario One: Simple 300 sq. ft. Rectangular Patio
- Assumptions: No permit required, easy site access, stable soil, materials are in stock.
- Week 1: Preparation. Day one involves site layout and calling 811 for utility marking. Days two and three are for excavation, subgrade preparation, and compaction. Days four and five are for installing and compacting the aggregate base.
- Week 2: Installation. Day six is for screeding the bedding sand and beginning to lay pavers. Days seven and eight are for completing the paver field and making edge cuts. Day nine involves installing edge restraints, sweeping in joint sand, and final compaction. Day ten is for site cleanup and a final walkthrough. This sequential schedule assumes good weather and no interruptions.
Scenario Two: Mid-Size 500 sq. ft. Patio with a Seat Wall
- Assumptions: A building permit is required for the 30-inch-high seat wall. The soil requires minor amendment.
- Weeks 1-3: Pre-Construction. The contractor submits permit applications. During this waiting period, materials are ordered and the homeowner finalizes selections.
- Week 4: Earthwork. Once the permit is issued, the crew begins excavation for both the patio and the deeper footing required for the seat wall. Subgrade and base preparation for the main patio area are completed.
- Week 5: Construction. The seat wall is constructed first, as it acts as part of the patio's edge. The remaining patio area is then laid, cut, and finished.
- Week 6: Finishing and Inspection. The project is cleaned up, and the contractor schedules the final building inspection for the wall.
Scenario Three: Large 900 sq. ft. Multi-Zone Patio with Drainage System
- Assumptions: Complex design requires HOA review and a city permit for extensive grading and a new drainage system (e.g., French drains).
- Month 1: Design and Approval. This month is dedicated to finalizing the design, getting HOA approval, and submitting the permit package to the city.
- Month 2: Site Work. After permit issuance, work begins. This includes extensive excavation, trenching for the new drainage pipes, and preparing the subgrade across multiple elevations. The drainage system is installed and inspected if required.
- Month 3: Hardscape Installation. The aggregate base is installed, followed by the paver installation. This phase takes longer due to the larger area and complexity.
- Month 4: Finishing. Final touches, jointing, sealing, site cleanup, and scheduling the final inspection. This longer timeline accounts for multiple dependent steps and potential inspection delays.
Common Delays and How to Plan for Them
Even with a perfect plan, unforeseen issues can affect your project's timeline. Understanding these potential hurdles can help you set realistic expectations. The most common cause of delay is weather. In Sacramento, winter rains can turn a job site into mud, halting all excavation and base work. Summer's extreme heat can slow productivity and affect the curing process for materials like polymeric sand. A professional contractor should have a plan for securing the site during weather events.
Material availability is another factor. While standard pavers are often in stock, custom orders or specialty items, perhaps for a unique "paver patio sacramento 2026" design, can have long lead times. Confirm material availability before demolition begins.
Perhaps the most significant source of delay comes from discovered site conditions. The crew might uncover an old foundation, a tangle of unmarked irrigation lines, or a pocket of exceptionally poor soil that requires removal and replacement. These discoveries can't be planned for but must be addressed, adding time and potentially cost to the project.
Administrative processes can also create bottlenecks. Waiting for a permit to be issued or for a required inspection can bring work to a standstill. Finally, homeowner decisions are a major variable. Changing your mind on the paver color or pattern after materials have been ordered, or adding a new feature mid-project via a change order, will inevitably extend the timeline. Try to finalize all design decisions before work starts to keep the project on track.
The Contractor Quote and Schedule Checklist
A detailed quote and schedule are your most important tools for ensuring a smooth project. When comparing bids from any "paver patio contractor sacramento", make sure you are comparing the same scope of work. Use this checklist to review their proposal:
- Scope Definition: Does the contract clearly itemize every step? This should include demolition, debris removal, excavation depth, type and thickness of base material, paver and sand specifications, edge restraints, and site cleanup.
- Responsibilities: Is it clearly stated who is responsible for securing permits, contacting 811 for utility marking, and scheduling any required municipal inspections? This should be the contractor.
- Site-Specifics: How does the proposal address your property's specific conditions? Look for notes on handling soil type, managing drainage, and protecting adjacent property.
- Timeline and Milestones: Does the contractor provide a projected start date and an estimated duration? The schedule should show key milestones, such as the completion of the base or readiness for a required inspection.
- Payment Schedule: The payment schedule should be tied to the completion of specific project milestones, not arbitrary dates. Be wary of contractors demanding a large upfront payment beyond a reasonable deposit.
- Change Order Process: The contract must describe the process for making changes. A written change order should detail the new work, the additional cost, and the impact on the schedule, and it must be signed by both you and the contractor before the extra work begins.
- Warranty: What kind of warranty is offered on workmanship and materials? Get the details in writing.
Frequently Asked Questions
Your guide to the most common questions about paver patio projects.
What is a realistic cost for a paver patio in Sacramento?
The cost of a paver patio in Sacramento depends entirely on size, material choice, site access, and project complexity. Based on hypothetical assumptions, a basic 300-square-foot patio using standard materials might range from $7,500 to $12,000. The "paver patio sacramento cost" can rise significantly with premium pavers, intricate patterns, steps, or walls.
To illustrate with an example, assume a contractor quotes $30 per square foot for a straightforward job. A 400-square-foot patio would be $12,000. Factors that increase this unit price include difficult site access requiring manual labor, the need for extensive soil correction, complex designs with many cuts, or the inclusion of features like seating walls, lighting, or drainage systems. Always get at least three detailed bids to understand the scope and cost for your specific project.
Do I need a permit for a paver patio in Sacramento?
Often, a simple ground-level paver patio does not require a building permit. However, you absolutely must verify this with your local jurisdiction, as adding features like a retaining wall over a certain height, a permanent roof cover, or significant electrical or gas lines will trigger permit requirements. Always confirm with the authority for your specific address.
Rules can vary between the City of Sacramento, Sacramento County, and neighboring municipalities. Even if a permit is not required, your project must still comply with local zoning regulations, such as property line setbacks and total lot coverage limits. A qualified contractor should be able to guide you through the requirements for your location, but the ultimate responsibility lies with the property owner.
How long should a paver patio last?
A professionally installed paver patio should last for 25 to 50 years, and often much longer. The longevity is not determined by the pavers themselves, which are incredibly durable, but by the quality of the unseen foundation beneath them. A properly excavated, graded, and compacted base is essential for a long-lasting installation.
If the subgrade and aggregate base are not properly prepared, the patio will be prone to sinking, shifting, and developing uneven spots within a few years. Proper drainage is also key to preventing water from compromising the base. With a solid foundation and minimal maintenance, such as occasionally topping up joint sand, your pavers will provide decades of service.
Is a DIY paver patio a good idea?
For a very small and simple patio, a DIY installation can be a feasible project if you are prepared for intense physical labor and have a strong attention to detail. However, the work is strenuous and unforgiving. Mistakes in the base preparation, which is the most critical stage, can lead to a failed patio that is costly to repair.
The process involves excavating and moving tons of soil and rock, and requires renting specialized equipment like a plate compactor and a wet saw. For any project of significant size, or one involving slopes, walls, or poor soil, hiring an experienced "paver patio contractor sacramento" is the recommended approach. They have the expertise, equipment, and crew to build a foundation that lasts.
Sources & Methodology
See the Golden Yards Methodology for how sources are reviewed, ranges are normalized, and planning-data limits are handled.
The links below are resources for checking project requirements. Their inclusion does not establish that scenario prices or timelines were observed in those sources. Hypothetical examples are planning assumptions, not documented projects.
- City of Sacramento - Building Division
- Sacramento County - Building Permits and Inspection
- USA North 811 - Call Before You Dig
Golden Yards Magazine Take
A beautiful "sacramento paver patio" is an investment in your home and your lifestyle, but its value is directly tied to the quality of the installation. The most critical work happens below the surface in the preparation of the subgrade and base. A contractor who rushes this foundational stage is not delivering a lasting product. Before you sign a contract, ensure the proposal explicitly details the site assessment, base preparation, compaction methods, and drainage plan. Put every detail in writing, from the exact materials to the cleanup process. A well-defined plan and a meticulously prepared base are the true secrets to a paver patio that you will enjoy for decades.
Ready to start your patio project?
Find My ProsFrequently Asked Questions
What is a realistic cost for a paver patio in Sacramento?
The cost of a paver patio in Sacramento depends entirely on size, material choice, site access, and project complexity. Based on hypothetical assumptions, a basic 300-square-foot patio using standard materials might range from $7,500 to $12,000. The "paver patio sacramento cost" can rise significantly with premium pavers, intricate patterns, steps, or walls.
To illustrate with an example, assume a contractor quotes $30 per square foot for a straightforward job. A 400-square-foot patio would be $12,000. Factors that increase this unit price include difficult site access requiring manual labor, the need for extensive soil correction, complex designs with many cuts, or the inclusion of features like seating walls, lighting, or drainage systems. Always get at least three detailed bids to understand the scope and cost for your specific project.
Do I need a permit for a paver patio in Sacramento?
Often, a simple ground-level paver patio does not require a building permit. However, you absolutely must verify this with your local jurisdiction, as adding features like a retaining wall over a certain height, a permanent roof cover, or significant electrical or gas lines will trigger permit requirements. Always confirm with the authority for your specific address.
Rules can vary between the City of Sacramento, Sacramento County, and neighboring municipalities. Even if a permit is not required, your project must still comply with local zoning regulations, such as property line setbacks and total lot coverage limits. A qualified contractor should be able to guide you through the requirements for your location, but the ultimate responsibility lies with the property owner.
How long should a paver patio last?
A professionally installed paver patio should last for 25 to 50 years, and often much longer. The longevity is not determined by the pavers themselves, which are incredibly durable, but by the quality of the unseen foundation beneath them. A properly excavated, graded, and compacted base is essential for a long-lasting installation.
If the subgrade and aggregate base are not properly prepared, the patio will be prone to sinking, shifting, and developing uneven spots within a few years. Proper drainage is also key to preventing water from compromising the base. With a solid foundation and minimal maintenance, such as occasionally topping up joint sand, your pavers will provide decades of service.
Is a DIY paver patio a good idea?
For a very small and simple patio, a DIY installation can be a feasible project if you are prepared for intense physical labor and have a strong attention to detail. However, the work is strenuous and unforgiving. Mistakes in the base preparation, which is the most critical stage, can lead to a failed patio that is costly to repair.
The process involves excavating and moving tons of soil and rock, and requires renting specialized equipment like a plate compactor and a wet saw. For any project of significant size, or one involving slopes, walls, or poor soil, hiring an experienced "paver patio contractor sacramento" is the recommended approach. They have the expertise, equipment, and crew to build a foundation that lasts.